
May 8, 2026
Most homeowners don’t realize how much their garage floor impacts the entire space until they see it transformed.
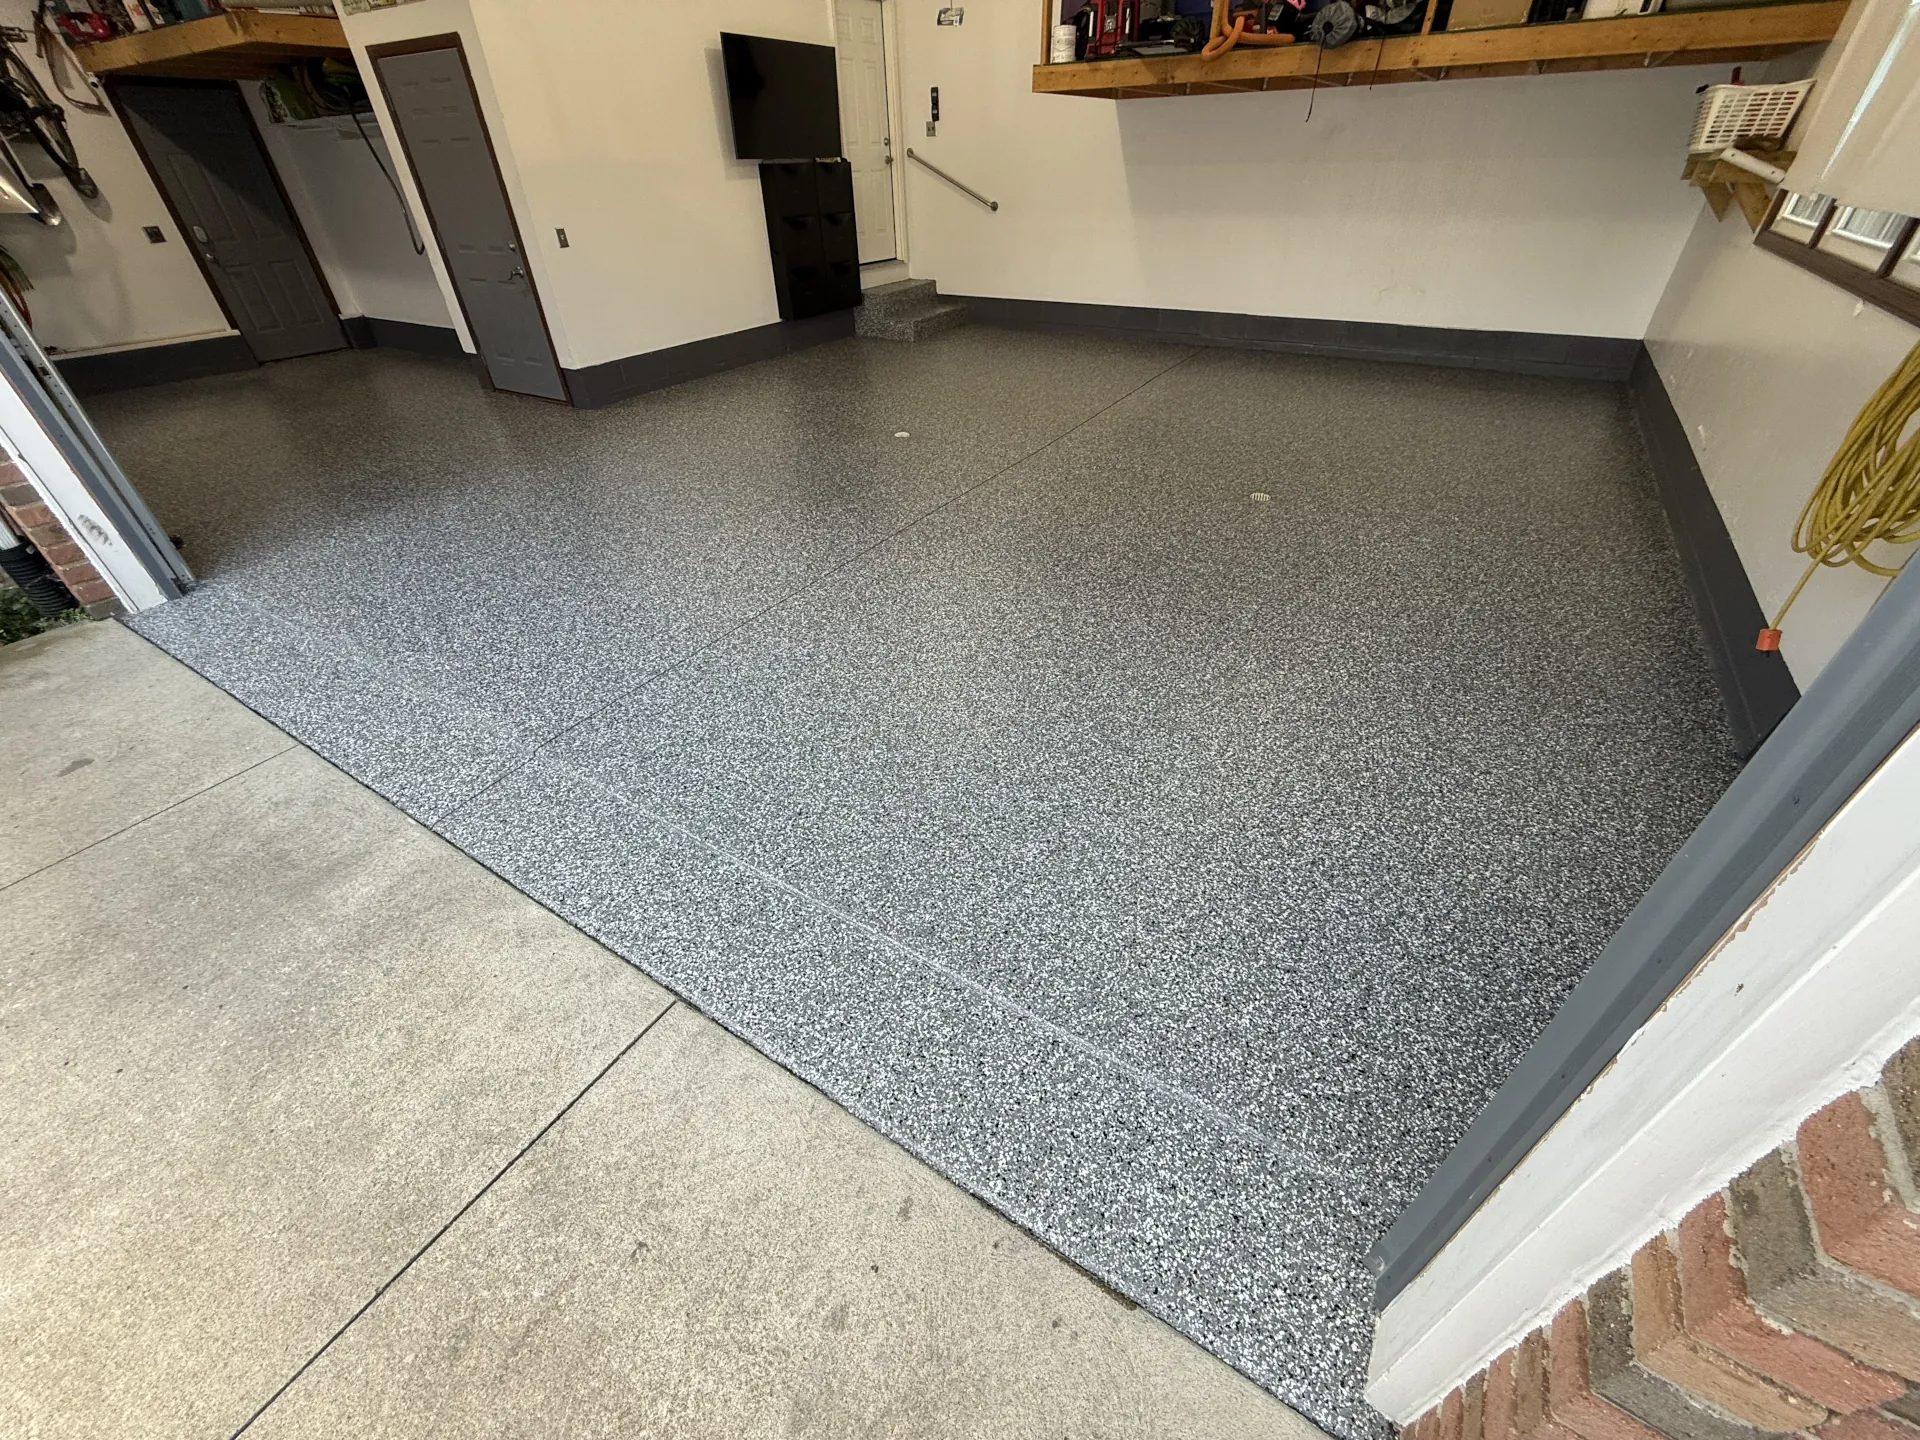
Cracked concrete, stains, dust, and discoloration make a garage feel unfinished, no matter how organized it is. A professionally installed garage floor coating changes that instantly. The difference between before and after isn’t subtle. It’s one of the most dramatic upgrades you can make to a home.
Looking at real floor coating photos tells the story better than any sales pitch. But understanding what goes into that transformation explains why the results last.
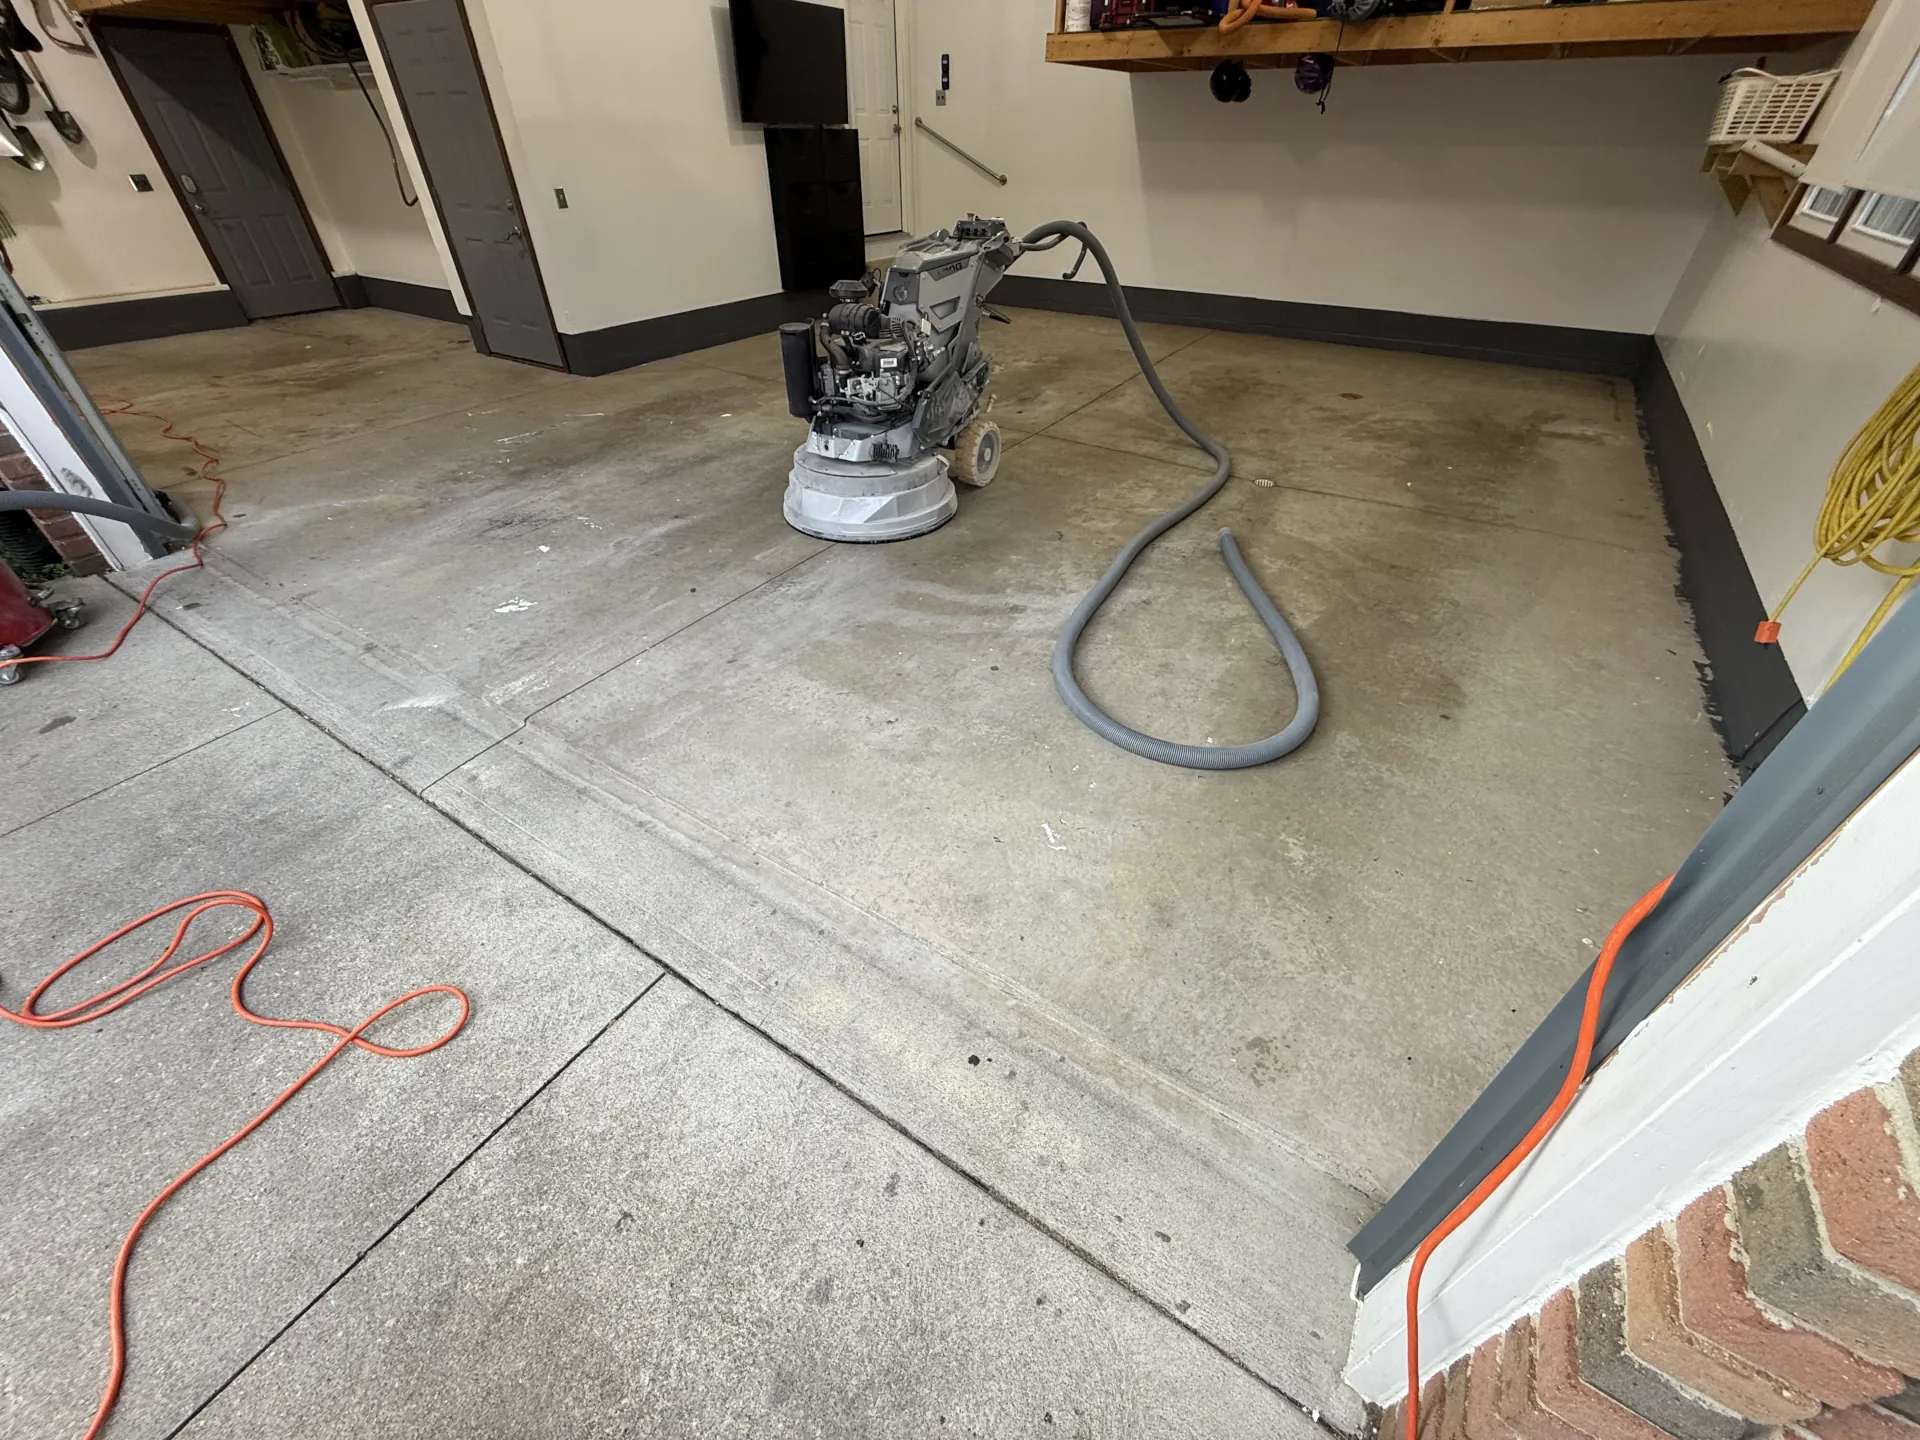
Concrete starts out strong, but it doesn’t stay perfect. Over time, it breaks down in predictable ways, especially in Ohio garages exposed to harsh conditions.
Most “before” floors show a combination of:
Even newer homes can show early signs of wear if the concrete wasn’t sealed or protected properly. Left untreated, these issues get worse. Moisture seeps in, stains set deeper, and small cracks expand.
The garage starts to feel like a neglected space.
A properly installed polyaspartic floor coating doesn’t just cover problems. It corrects them.
The transformation includes:
The visual difference is immediate. What used to look worn and stained now looks intentional and built to last.
Floor before and after comparisons highlight something important: the quality of the prep work determines the quality of the result.
The biggest misconception about garage floor coating is that it’s just a layer applied on top. That approach leads to failure.
Professional installations start with mechanical grinding. This opens the concrete surface, allowing the coating to bond properly. Any cracks or damaged areas are repaired before the coating is applied.
Without this step, coatings sit on the surface instead of bonding into it. That’s when peeling and chipping happen.
The difference between an average result and a long-lasting one comes down to preparation.
A high-quality polyaspartic floor coating system follows a proven process:
Each step builds on the last. Skipping or rushing any part of the process compromises the outcome.
When you look at before and after garage floor projects, certain details separate professional work from shortcuts.
High-quality results show:
Photos also reveal durability over time. Floors that still look consistent years later are the ones that were installed correctly from the start.
The visual upgrade is obvious, but the performance improvements matter just as much.
After coating, a garage floor becomes:
The non-porous surface prevents stains from soaking in. Spills stay on the surface, making cleanup simple.
For many homeowners, the garage shifts from a purely functional space to something more usable, like a workshop, gym, or extension of the home.
One of the most surprising parts of the process is how quickly it happens.
Most garage floor coating projects can be completed in a single day. The fast cure time of polyaspartic coatings allows homeowners to return to using their garage almost immediately.
That speed doesn’t come at the expense of quality. It’s a result of using materials designed for performance and efficiency. You can learn more in this 2026 garage floor coatings guide.
Not every before-and-after story ends well. Floors fail when shortcuts are taken.
Common reasons include:
These failures usually show up within the first year. Peeling, bubbling, and discoloration are signs that the system didn’t bond correctly.
The difference between a short-term improvement and a long-term upgrade comes down to doing the job right the first time. This is one reason many homeowners compare polyaspartic vs epoxy flooring before choosing a system.
Every garage is different, but the transformation follows a similar pattern.
Before:
After:
The change is both visual and functional. It’s not just about appearance. It’s about creating a surface that holds up.
Garage floor coating is one of the few upgrades where the before-and-after difference speaks for itself. The right system transforms concrete from a problem area into a durable, low-maintenance surface that improves the entire space.
Floor coating photos highlight the impact, but the real value comes from what you don’t see: strong bonding, proper prep, and materials designed to last.
A well-installed polyaspartic floor coating delivers both. It looks better on day one and continues to perform long after. Contact us today!